Logo Blocks Tutorial — Beginner Mode
Take your first steps with this Quick Start Guide!
Try some Logo Blocks activities.
View and download a PDF of this tutorial.
A popular way to learn to code is to use blocks. Each block contains an instruction. You can combine blocks to make larger programs.
Terrapin Logo offers blocks! What makes Logo Blocks different from other block coding apps is that code for the Logo programming language is automatically generated when you put blocks together.
To start exploring, launch logoblocks.terrapinlogo.com (it will open in a new tab).
When you first start Logo Blocks, you will see the Beginner set of blocks. After you learn how to use blocks, you can switch to the Intermediate set of blocks with lots more blocks for graphics and sound, and finally the Advanced set of blocks, which gives you access to a broad range of commands.
Let’s see how block coding works! We’ll start in Beginner mode.
Move and Turn the Turtle

In Beginner mode, use the blocks in the first four rows to move the turtle forward and back.
 The first three blocks in each group move the turtle a specific distance: 10, 50, or 100 steps.
Drag the forward 100 block into the workspace area to the right of the blocks.
Then, click the green arrow to run the code.
If you look at Logo Code, you will see that Logo added the code for the button you added. This is the code that Logo will be running.
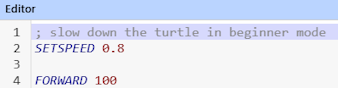
Logo adds a command to slow the turtle down in Beginner mode. That lets you watch how it moves.
The Forward and Back blocks with the number 100 are for a variable distance. You can change the number 100 to any value you choose, after you drag it to the workspace.
Each time you click the Run button, Logo follows your commands.
 To erase your block, drag it to the Trash can at the bottom of the command area. Doing that also erases your code in Logo Code and your picture in the Graphics area.
The next four rows of blocks are for turns.

You can turn 45, 90, 135, or 180 degrees to the right or left. You can change 180 to any number you choose if you want a different angle.
Use the mouse to select the angle you want.

Buttons
At the upper left of the Blocks area is a small yellow arrow. Click it to show or hide the blocks. ![]()
At the bottom of the Graphics panel are two buttons. 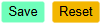
- Click Save to keep your picture. Give it a name and click OK. The file goes to your Downloads folder.
- Click Reset to erase your drawing. There is no warning, so be sure you really want to erase your picture!
At the bottom of the Logo Code panel are three buttons. 
- Click Save to keep your Logo code. Give it a name and click OK. The file goes to your Downloads folder. You can open the code in Terrapin Logo.
- Click Run to start your program. It is the same as pressing the large green arrow at the left.
- Click Stop to stop your program. It will only be red when a program is running.
At the bottom of the Blocks panel are three buttons. 
- Click Load to load block code that you have previously saved. Look for it in your Downloads folder.
- Click Save to keep your code. Give it a name and click OK. The file goes to your Downloads folder.
- Click Restart to erase your drawing, blocks, and Logo Code. Now you are ready to start a new project! You will be asked if you want to do this.
Control How the Turtle Draws
The next row of blocks lets you control the drawing.
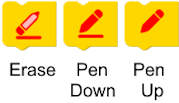
Use the Erase block to clear the drawing. Put it the beginning of your code to erase any lines that are already in the Graphics panel. The Logo command is CS, short for Clearscreen.
Use the Pen Down block to lower the turtle’s pen so it can draw a line.
Use the Pen Up block to raise the turtle’s pen so it can’t draw.
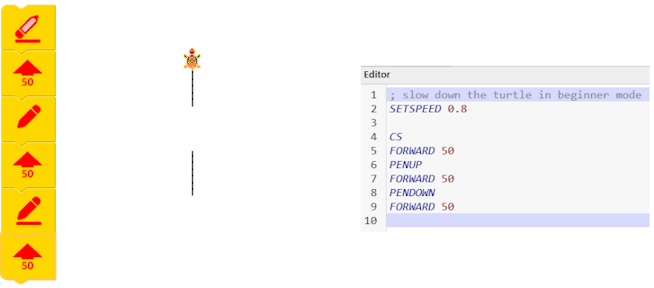
Here is what your block code might look like, what the turtle draws, and what is recorded in Logo Code.
Change How the Turtle Looks
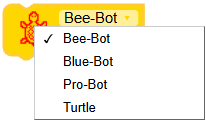
You can change the turtle to look like your favorite robot! Or, choose Turtle to reset it to its normal shape.
Just click the down arrow and choose the one you want.
Create Loops
The last block in the Beginner section lets you create loops! Logo calls this a REPEAT command.
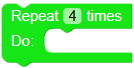
You can change the 4 to any number. Just click where the 4 is and type a new number. Beware of typing too large a number! It might take a very long time to finish. However, you can always click the red Stop button at the bottom of the Logo Code area.
After the word Do: is a place to attach a block.
You can drag a forward block after Do: to include it in the Repeat block.
You can then add another block to be repeated.
What do you think this code will draw? Compare the block code to what is in Logo Code.
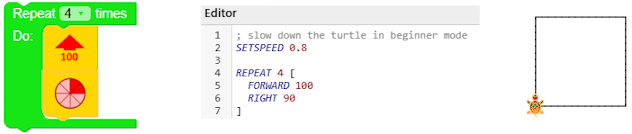
The turtle will move forward 100 steps, and then turn right. It will do that 4 times.
Do you see the design in the Graphics area? Now you know how to draw a square!
How could you change the square? Can you make it larger or smaller? Can you add a block to erase the drawing before it runs the program?
Edit Your Code
To edit a block program, you can drag a block down to disconnect it and other blocks that are attached to it.
Drag the Forward 100 block in the Repeat loop out of that block.
Now, drag the Right 90 block down to separate it from the Forward 100 block.
Now you can move either (or both) of those commands to the Trash can.
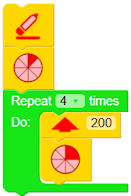
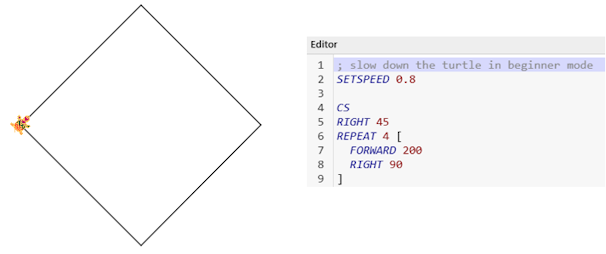
Replace the Forward 100 block with a different block. Try adding the variable Forward command and set the number of steps to 200. Click in the box with 200 and type a different number.
This code erases the screen, turns the turtle 45 degrees to the right and then draws a larger square.
Here are the results:
Play around with different turns and distances.
You will notice that every time you make a change to the blocks, the instructions in Logo Code changes to match it.
Did you know that you can nest repeats? That means you can put one Repeat block inside the other.
Try this!

Save and Load Your Code

To save your Logo Blocks program, click the Save button at the bottom of the blocks area.
Type a name for your file that describes what you did. When you click the OK button, the file is saved to the Downloads folder in your computer.
To get a saved program back, click the Load button. Saved programs go to your Downloads folder, so you may find it there. But you may have moved the file to a different location. If you need to search for the program, remember that its file name ends with .xml.
Note that the Save button in Logo Code saves just the Logo commands that are in the Logo Code area. If you do this, you can use the code later in the full Logo programming language.
Print Your Block Code and Picture
You can use your browser’s Print option to print your entire screen, but you may not like the results. The text and graphics will be likely too small! You can set the scale to a number less than 100%, depending on the size of your block code and the picture it drew.
Another option is to use your computer’s PrintScreen function. You can generally select the area you want to capture. This action will copy the area you choose to the Clipboard. You can then paste it into another application to print it. Refer to your computer’s Help for details.
Quit Logo Blocks
To exit Logo Blocks, click the red Quit button at the bottom right of the workspace area. 
You can click Yes to log out or No to stay in Logo Blocks.
If you have a project in progress, you will have a chance to save it before quitting. When you start up Logo Blocks the next time, your work will be restored.

When you are ready, go on to the Intermediate Mode Tutorial. It has many more blocks to explore!