Using the Menus and Changing Settings
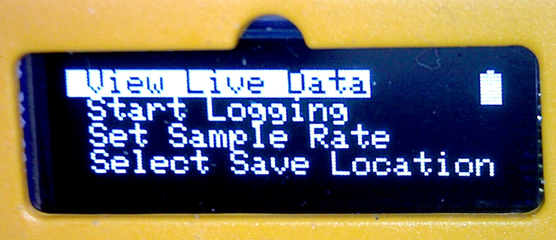
When you first turn on the Data Logger, the display will light, with the top menu item highlighted.
To navigate through the menu options, use the arrow keys on the left side.
The upper button at the right is the OK (Select) button.
The lower button at the right, the Back button returns you to the previous screen.
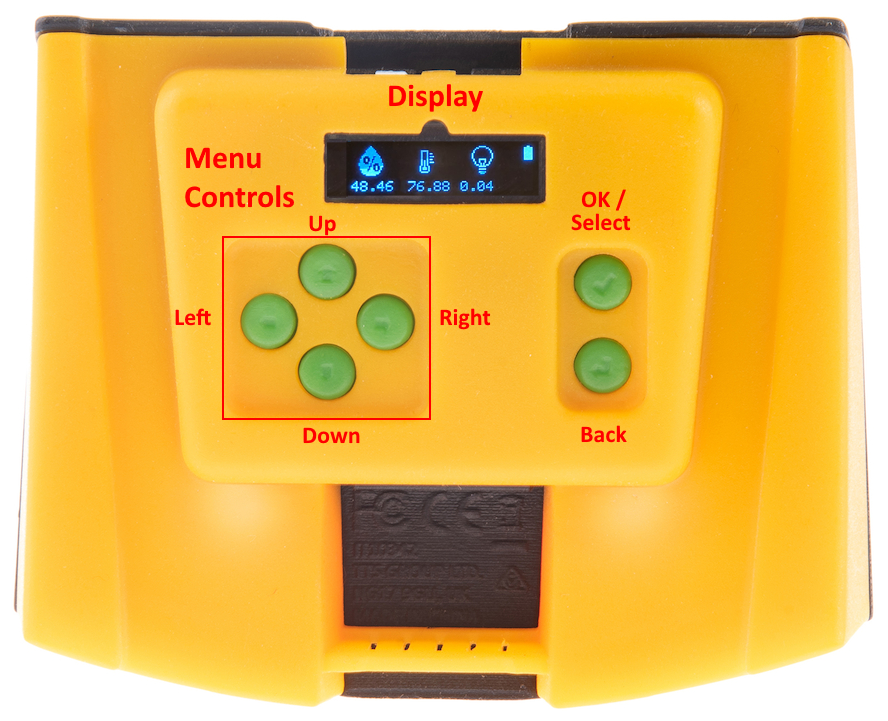
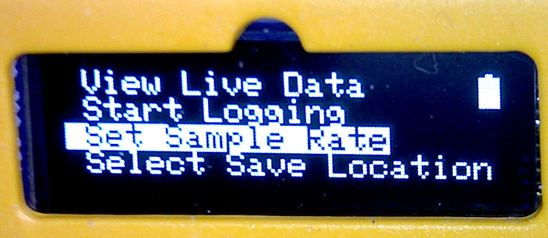
Menu Items
View Live Data
This first menu item allows you to look at current conditions of humidity, temperature and light, without saving the data.
Press the green button at the upper left to select the highlighted menu item, View Live Data.
You will then see the current data that the logger is detecting.
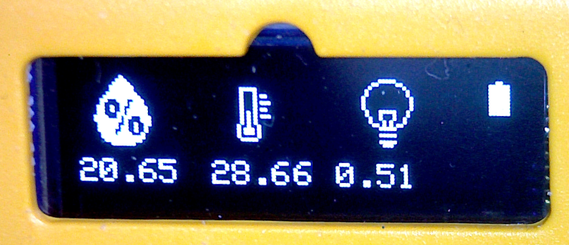
- The first icon represents the humidity using a value of 0–100%
- The second icon is for temperature. The default unit is degrees Celsius. You can change that setting (see below).
- The third icon shows the light level in Lux.
Start Logging
Choose this menu item to save data using the current settings.
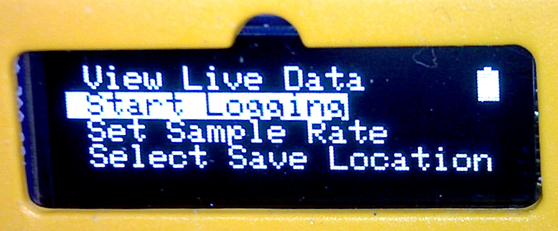
Use the down arrow and press OK to start logging data.
You should first review the following settings to make sure you are collecting the data in the way you want.
Place the Data Logger on top of Tuff-Bot and you are ready to start recording data.
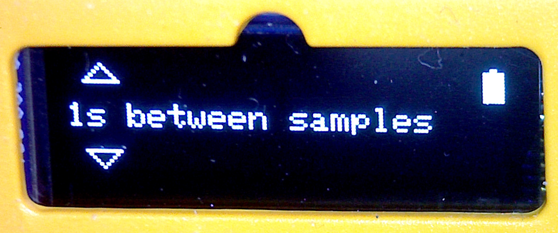
Set Sample Rate
Use the down arrow and OK to choose how often data points are recorded.
The choices are 1 second, 10 seconds, 30 seconds, and 60 seconds.
- 1 second gives a memory capacity of 8158 seconds / 136 minutes / 2 hours 16 minutes
- 10s gives a memory capacity of 81580 seconds / 1360 minutes / 22 hours 40 minutes
- 30s gives a memory capacity of 244740 seconds / 4079 minutes / 67 hours 59 minutes
- 60s gives a memory capacity of 489480 seconds / 8158 minutes / 135 hours 58 minutes
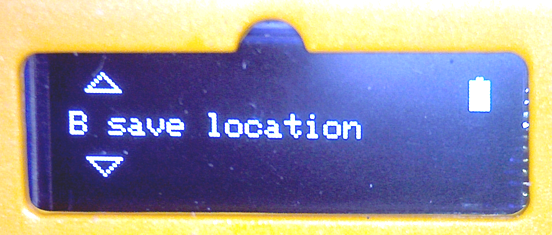
Set Save Location
The Data Logger has seven locations where it can store data. Think of these data blocks as files. They are named A through G.
If you don’t choose a location, it uses A. If A becomes full, you can either erase the data in that location (see below) or use the down arrow and Select to choose a different location.
Here is what you would see if location A is filled with data.
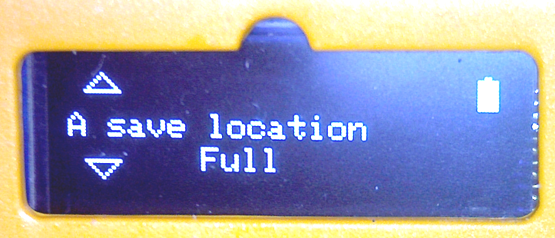
Use the down arrow to look at the next location, and press OK to choose it. Use the Back arrow to return to the main menu.
Erase Previous Data
Use this option to clear the data from the save location you select.
That save location then becomes available for use.
Set Time
Use this option to set the time. This will be included in the data you export.

This setting uses a 24-hour clock, so for 1:30 PM, you would set the time to 13:30.
Use the down arrow keys to change numbers. Use the right arrow key to move to the next unit.
Press OK when you are done.
Select Temp. Unit
Use this option to change to Fahrenheit for the temperature, if desired.
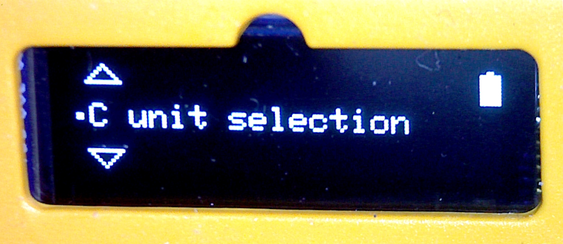
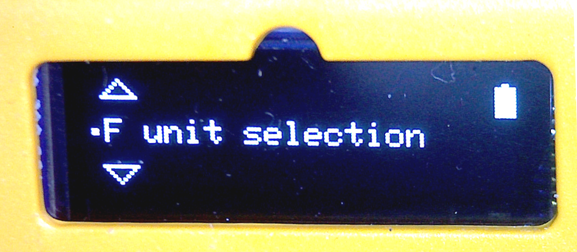
Use the down arrow and OK to choose the unit you want.
If you accidentally take a log in the wrong unit type, you can change the unit type later and the
temperature data will be adjusted when the data is exported, without needing to log the
data again.
Export
The Export process is explained on this page.