Using Turtle Shapes
SETSHAPE SHAPE STAMP LOADSHAPE EDSHAPE
In this section, you will learn about commands and other ways to change the turtle’s shape.
SETSHAPE name-of-shape
SETSHAPE turtle-number
(SETSHAPE)
Use SETSHAPE to change the appearance of one or more turtles.
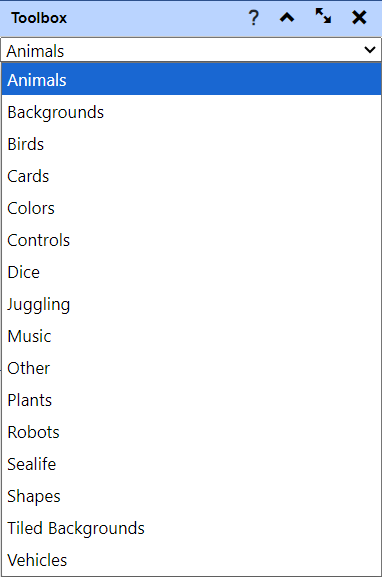
You can set the shape to any of the images in the Toolbox window. Select Toolbox from the Windows menu at the top of the screen to see the shapes. Choose a category from the drop-down menu. There are many to choose from!
You can simply drag a shape on top of a turtle to change its shape, or you can use the SETSHAPE command. Using a command allows you to modify the turtle shape from a program you write.
Here is a sample command. Type this to turn the turtle into a Bee-Bot robot:
SETSHAPE "|~HOME/TOOLBOX/ROBOTS/BEE-BOT.PNG|
You always need to start with ~HOME/TOOLBOX, then the category name, then the name of the shape.
Be sure to start with a quotation mark ("), then a vertical bar (|), which is on the same key as \ on the keyboard, then end with another vertical bar.
Note that you can type upper or lower case letters in the SETSHAPE command.
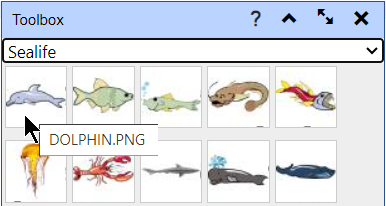
To find out the shape’s name in the Toolbox, hover your mouse pointer over the shape and you will see its name.
The turtle, which now looks like a robot, can move, turn, and draw, just like a regular turtle.
You may not always want the shape to rotate. If you want to prevent the shape from rotating when you turn it, you can use the LOCKSHAPE command (see the Appearance section.)
When you use this command, all active turtles take on that same shape. However, you can talk to individual turtles (see the Using Multiple Turtles section.)
If one turtle has a different shape from all the others, you can use SETSHAPE to change all active turtles to the shape of the turtle you specify by number. For example, set up 6 turtles, numbered 0 through 5, and spread them out like this. Drag a playing card on top of turtle 2. (Remember to start counting them at 0.) Then type this command, which changes all the active turtles to have the same shape as turtle 2.
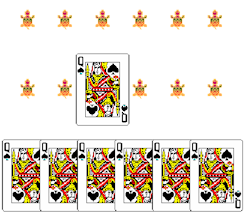
SETSHAPE 2
To return all active turtles to their original shapes, use this command:
(SETSHAPE)
» Things to Try
Find different shapes you want to use in the Toolbox and use SETSHAPE to change the turtle to each one.
A shortcut for setting a shape from the Shapes category is to use LOADSHAPE. See more below about this use of that command.
See the STAMP command below for more fun with shapes!
If you see an error message that the shape you name cannot be found, make sure you have the category name correct in the command.
In this command, the category name is ANIMALS:
SETSHAPE "|~HOME/TOOLBOX/ANIMALS/RABBIT.PNG|
Here’s something fun to try.
Save this image to your computer: https://resources.terrapinlogo.com/weblogo/learning_center/img/race_track_mat.png
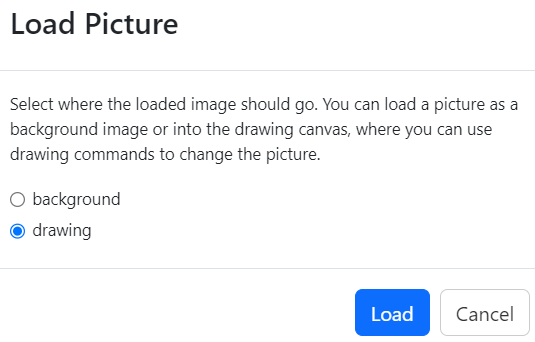
Load the image into Logo as a drawing. (Use the File menu command called “Load an image…”.)
Set the turtle shape to be a Bee-Bot using SETSHAPE "|~HOME/TOOLBOX/ROBOTS/BEE-BOT.PNG|.
Make the Bee-Bot a little smaller with SETTURTLESIZE .75.
Move Bee-Bot to the starting box. The easiest way is to type PU SETPOS MOUSE and before you press Enter, move your mouse to the lower left box. When you press Enter, Bee-Bot will go to where the mouse pointer is. Can you get Bee-Bot through the race track?

SHAPE
SHAPE reports the name of the image of current turtle’s shape.
For example:
SETSHAPE "|~HOME/TOOLBOX/ANIMALS/RABBIT.PNG|
SHAPE
Result: RABBIT.PNG
» Things to Try
Set the turtle to different shapes and look at what SHAPE reports for each one.
Does it report the entire path to get to the shape, or just the shape?
Does it include the extension of the filename, such as .PNG or .JPG?
STAMP
STAMP places an image of the turtle’s shape at its location. If multiple turtles are active, they all stamp their shapes.
The turtle will stamp its shape even if its pen is up.
You can hide turtle turtle with HIDETURTLE or HT to see the stamped shape.
» Things to Try
What do you think this instruction will do?
REPEAT 4 [STAMP FD 50 RT 90] HT
LOADSHAPE filename
(LOADSHAPE)
LOADSHAPE allows you to use a graphics file on your computer as a turtle shape.
If you want to use a shape that is in the Shapes folder of the Toolbox, all you need to do is use its name (without the extension) as input to LOADSHAPE, like this:
LOADSHAPE "train
If you give LOADSHAPE a list of extensions, like this (don’t include the period before the extension):
LOADSHAPE [png jpg bmp]
you can navigate to any folder on your computer and see just the graphics images that have those file extensions. It’s a handy filter that doesn’t show you everything in that folder, just the image files.
Try using LOADSHAPE with no inputs, like this.
(LOADSHAPE)
A dialog box will open and you can navigate to any folder on your computer and see just the graphics images. Click a file to set the turtle to that shape.
You can also load shapes into the Shape Editor. See more about that below, in EDITSHAPE.
» Things to Try
Try changing the shape of a turtle by loading an image from your computer.
Note that if you are using multiple turtles, all of them will change to that image.
For example, the instructions below use multiple turtles to make this design:
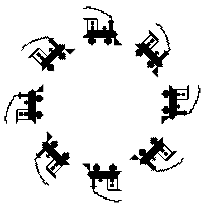
CTURTLES 8
LOADSHAPE "TRAIN
PU FD 50
EDSHAPE
EDSHAPE launches the shape editor. You can also choose “Shape Editor…” from the Tools menu.
When you open the shape editor, you will see either the current turtle shape or the most recent shape you were editing.
You can also load a shape from your computer to edit.
The Logo Manual has an easy-to-understand explanation of all the features of the shape editor.
Learn more about the shape editor.
» Things to Try
Try loading a shape into the shape editor and adding to it, rotating it, flipping it, and more.
Create a new shape from scratch.
Save the shapes that you can create so you can use them again.