Chapter 4: More Turtle Graphics
In this chapter, you’ll continue exploring turtle graphics by starting at the turtle’s home and looking at the turtle’s world in a different way. Then, you’ll see that the turtle does not always look like a turtle, but its actions are still called turtle graphics. And finally, you’ll see that the turtle is not alone - you can have hundreds of turtles if you need them.
The Turtle’s Grid
The Graphics window uses a coordinate system that identifies every possible turtle position with a list of two numbers. With the turtle at HOME, type:
GETXY
The GETXY command (or POS) outputs the
turtle’s current position as a list of two numbers. The first number is
called the x-coordinate - it tells how far the turtle is to the right or
to the left of the home position. The second number is called the
y-coordinate - it tells how far the turtle is above or below the home
position. The two numbers together are called a coordinate pair, a
coordinate point, just a coordinate, or just a point. No matter what you
call it, it marks the position of the turtle. Every position on the
Graphics window has its own unique coordinate pair - no two points on
the screen have the same pair of numbers.
The turtle’s home position is the coordinate [0 0]. It’s not only the starting position for the turtle, it’s also the starting point for all of the coordinates that identify all of the other turtle positions, even in WINDOW mode when the turtle is moved beyond the boundaries of the Graphics window. Positions to the right of home have a positive number for the x-coordinate; positions to the left of home have a negative number for the x-coordinate. You can move the turtle right or left of home by changing its x-coordinate with the SETX command. It takes a number as input and moves the turtle horizontally to the new position. Type the following commands and watch the turtle move.
SETX 300
SETX -300
SETX 0
 Positions above home have a
positive number for the y-coordinate; positions below home have a
negative number for the y-coordinate. You can move the turtle above or
below home by changing its y-coordinate with the
SETY command. It takes a number as input and
moves the turtle vertically to the new position. Type the following
commands:
Positions above home have a
positive number for the y-coordinate; positions below home have a
negative number for the y-coordinate. You can move the turtle above or
below home by changing its y-coordinate with the
SETY command. It takes a number as input and
moves the turtle vertically to the new position. Type the following
commands:
SETY 200
SETY -200
SETY 0
The vertical line through [0 0] is called the y-axis; the horizontal line through [0 0] is called the x-axis. These lines divide the screen into four sections called quadrants. Each quadrant has a different combination of positive and negative values for the coordinates. Type the following commands:
RIGHT 45
REPEAT 4 [FORWARD 50 TT GETXY BACK 50 RIGHT 90]
 Knowing the signs of the coordinates
gives you an idea of where the turtle is in relation to home. When both
coordinates are positive, the turtle must be in the upper right
quadrant; when both coordinates are negative, the turtle must be in the
lower left quadrant. The upper left and lower right quadrants each have
one positive and one negative coordinate.
Knowing the signs of the coordinates
gives you an idea of where the turtle is in relation to home. When both
coordinates are positive, the turtle must be in the upper right
quadrant; when both coordinates are negative, the turtle must be in the
lower left quadrant. The upper left and lower right quadrants each have
one positive and one negative coordinate.
 In the example above, the turtle moved
diagonally 50 turtle steps each time. A diagonal movement is partly
horizontal and partly vertical. To see this more clearly, type the
following commands:
In the example above, the turtle moved
diagonally 50 turtle steps each time. A diagonal movement is partly
horizontal and partly vertical. To see this more clearly, type the
following commands:
SETX 35 TT GETXY SETY 35
This puts the turtle back at position [35 35] which is 50 turtle steps from home. Notice that the turtle is still rotated 45 degrees. When you move the turtle to a coordinate, it does not affect the direction the turtle is heading. (With SLOWTURTLE, you will see the turtle rotate towards the coordinate point, move to the coordinate point, and then restore its original heading.)
You can move the turtle to any position with the
SETXY command (or SETPOS). It needs a
list of two numbers - the new x-coordinate and the new y-coordinate. The
turtle moves directly to the new coordinate in a straight line. Here is
a quick example of random line art using the
SETXY command. The
LIST command takes two inputs and outputs a
list.

CS REPEAT 25 [SETXY LIST RANDOM 250 RANDOM 150]
Drawing shapes with SETXY and other
coordinate movements is not as easy or as flexible as using relative
movements like FORWARD and
RIGHT. Define the procedure SQUARE.XY
which uses SETX and
SETY to draw a square of any size by
adjusting the x-coordinate and the y-coordinate as the turtle draws.
GETX outputs the current x-coordinate;
GETY outputs the current y-coordinate.
TO SQUARE.XY SIZE
    SETX XCOR + SIZE
    SETY YCOR + SIZE
    SETX XCOR - SIZE
    SETY YCOR - SIZE
END
Using your original SQUARE procedure and the new SQUARE.XY
procedure, type in the following commands:

CS
SQUARE 100
SQUARE.XY 50
RIGHT 45
SQUARE 100
SQUARE.XY 50
The second square drawn with SQUARE.XY is the same as the first one,
even though the turtle has rotated 45 degrees! All of the squares drawn
with SQUARE.XY are drawn in the same orientation - upright. Try making
a diamond shape with coordinate movements. Turtle movements with
FORWARD,
BACK, LEFT and
RIGHT are called relative movements. It
doesn’t matter where the turtle is or which way it’s heading - the
movements and turns are done in relation to the turtle’s current
position and heading. Relative movements allow you to draw the same
shape in any orientation simply by turning the turtle and running the
same sequence of commands again. This is such a simple idea that it’s
hard to appreciate how powerful it really is until you compare a
relative drawing with a coordinate drawing. To the turtle, a square is a
square. To you, a square may be a diamond, depending on how you look at
it The coordinate system of the turtle’s world is called the Cartesian
coordinate system. It is named after its inventor, the French
mathematician Rene Descartes. Why isn’t it called the Descartian system?
Because, at the time, important works were written in Latin, so Rene
Descartes signed his name as Renatus Cartesius. The coordinate system is
not usually used for making a drawing, but it is an important part of
the turtle’s world, along with the turtle’s compass.
The Turtle’s Compass
 A real compass is a tool for measuring direction
or heading. You usually think of compass headings as north, south, east,
west or something in between, like northwest or southeast. Each point of
the compass also has a number associated with it that tells how many
degrees from north each heading is as you rotate to the right (or
clockwise). By navigational convention, north is a heading of 0 degrees,
east is a heading of 90 degrees, south is 180 degrees, and west is 270
degrees. If you continue the clockwise rotation for another 90 degrees,
you’ll end up pointing north again with a heading of 0 degrees. There
are 360 degrees in a complete circle around the compass, but they are
numbered from 0 to 359. (It’s not only computers that start numbering
from zero!)
A real compass is a tool for measuring direction
or heading. You usually think of compass headings as north, south, east,
west or something in between, like northwest or southeast. Each point of
the compass also has a number associated with it that tells how many
degrees from north each heading is as you rotate to the right (or
clockwise). By navigational convention, north is a heading of 0 degrees,
east is a heading of 90 degrees, south is 180 degrees, and west is 270
degrees. If you continue the clockwise rotation for another 90 degrees,
you’ll end up pointing north again with a heading of 0 degrees. There
are 360 degrees in a complete circle around the compass, but they are
numbered from 0 to 359. (It’s not only computers that start numbering
from zero!)
The turtle has a built-in compass that keeps track of the direction it’s heading. In the turtle’s world, a heading of 0 degrees is towards the top of the Graphics window. You can see what the turtle’s heading is with the HEADING command. It outputs the turtle’s compass heading. The relative turns using RIGHT and LEFT modify the turtle’s heading in relation to its current heading. The new compass heading is usually very different from the number of degrees in the relative turn. Turn the turtle a few times using RIGHT and LEFT commands with different numbers, both large and small. Check the new compass heading after each command.
LEFT 75 HEADING
RIGHT 45 HEADING
LEFT 200 HEADING
RIGHT 90 HEADING
HOME HEADING
 With the turtle at home, any
RIGHT turn from 0 to 359 will set the
turtle’s heading to the same value. A turn of 360 degrees has the same
effect as no turn at all! Turns larger than 360 degrees are kind of
silly, since the turtle turns completely around in a circle for each 360
degrees. Try the following set of commands:
With the turtle at home, any
RIGHT turn from 0 to 359 will set the
turtle’s heading to the same value. A turn of 360 degrees has the same
effect as no turn at all! Turns larger than 360 degrees are kind of
silly, since the turtle turns completely around in a circle for each 360
degrees. Try the following set of commands:
SLOWTURTLE
RIGHT 720
SETSPEED 1
You can point the turtle in any direction with the
SETHEADING command (SETH for short).
It takes any number as input and rotates the turtle to a new compass
heading. The new heading is always a number from 0 to 359. A number
larger than 359 sets the heading to the remainder of the input number
divided by 360. For example, SETHEADING 800 is the same as
SETHEADING 80. (800 divided by 360 is 2; 2 times 360 is 720; 720 from
800 leaves 80) You can use negative numbers, too. A negative heading is
a counterclockwise rotation from a heading of 0 degrees. The resulting
compass heading will still be a number from 0 to 359, not a negative
number. For example, SETHEADING -90 results in a new compass heading
of 270.
TO COMPASS POINTS
    CS
    REPEAT POINTS [FORWARD 100 TT HEADING BACK 100 RIGHT 360 / POINTS]
END
Sometimes it’s handy to have a “compass” around to remind you which way
a particular heading turns the turtle. Here is a simple procedure to
draw a turtle’s compass. It uses the input :POINTS to divide the
compass. Try different values for:POINTS. The most useful are 4, 8, 12
and 16, but 3, 5 and 6 are interesting. You can print the compass you
want and keep it next to your computer.
It’s interesting to see the headings as the turtle draws a shape. Try the following commands. See if you can follow how each heading is determined:

CS REPEAT 8 [FORWARD 100 RIGHT 135 TT HEADING]
You can set the turtle’s heading towards any coordinate point by combining the SETHEADING command with the TOWARDS command. TOWARDS takes a coordinate pair as input and outputs the compass heading that would make the turtle head towards the coordinate point. Logo uses the coordinate system to keep track of the mouse pointer as well as the turtle. The MOUSE command outputs the coordinate pair that identifies the current position of the mouse pointer. Before you type the following command line, click into the Listener window to make it active, then move the mouse pointer into the Graphics window somewhere away from the turtle.
SETHEADING TOWARDS MOUSE
Move the mouse pointer to different places on the screen and use the up-arrow key to repeat this command line. It’s quite difficult to get the heading to an exact value like 0 or 90. The compass headings can have decimal values from 0 up to but not including 360 degrees. To draw a line with FORWARD from the turtle to the mouse pointer, you need to know the distance between them as well as the heading. The DISTANCE command takes a coordinate pair as input and outputs the number of turtle steps between the turtle and the coordinate point. Here is an example you can try:
SETHEADING TOWARDS MOUSE FORWARD DISTANCE MOUSE
Although this works just fine, don’t forget the coordinate drawing tools. The following command does just about the same thing. What’s different?
SETXY MOUSE
The coordinate movement does not change the turtle’s heading.
Miscellaneous Drawing Tools
Without changing its position at all, the turtle can draw a dot anywhere on the Graphics window. The DOT command needs a coordinate pair as input and draws a single dot at the coordinate point. It’s hard to see a single dot unless you put a lot of them near each other. Try this:
PD REPEAT 1000 [DOT LIST RANDOM 50 RANDOM 50]
If you keep repeating this command, it will eventually fill in the
square completely. If you change the pen to
PENERASE (PE for short), it will
eventually erase all of the dots. Change the pen to
PENREVERSE (PX for short) and try it
a few more times.
PX REPEAT 1000 [DOT LIST RANDOM 50 RANDOM 50]
Chances are, the square will never get completely filled or erased. It will be a little different each time. The dots are drawn using the turtle’s pen settings. If you want bigger dots, change the pen width. Change the pen color to get different colored dots. To draw a dot at the turtle’s current position, type:
DOT GETXY
The dots are filled-in circles whose diameter is set by the turtle’s pen width. Logo has a special command for drawing circles, called STAMPOVAL . A circle is a special case of an oval, in a similar way that a square is a special case of a rectangle. STAMPOVAL takes two numbers as input. The first number is the horizontal radius; the second number is the vertical radius. If both numbers are the same, the shape is a circle. Type:
STAMPOVAL 100 100
 The ovals are drawn with their center
at the turtle’s current position. The turtle’s heading does not change
the orientation of the ovals. Using different numbers makes circular
shapes that are stretched in one direction or the other. Add this
sequence of ovals to your circle:
The ovals are drawn with their center
at the turtle’s current position. The turtle’s heading does not change
the orientation of the ovals. Using different numbers makes circular
shapes that are stretched in one direction or the other. Add this
sequence of ovals to your circle:
STAMPOVAL 75 100
STAMPOVAL 50 100
STAMPOVAL 25 100
If you want the ovals filled in, you have to use an optional input with STAMPOVAL and enclose the entire command in parentheses. Type:
(STAMPOVAL 100 100 "TRUE)
The parentheses are required to force
STAMPOVAL to include the optional
input; otherwise, it would only expect the two numbers as input. In this
case, the word “TRUE tells STAMPOVAL
that you want a filled-in oval. Many Logo commands have a default (or
expected) number of inputs. When you use a different number of inputs
than what is normally expected, you have to use the parentheses to
indicate that you are doing something out of the ordinary. Filling the
circles can be done with the FILL command,
but it’s faster to let STAMPOVAL do it.

TO TARGET
    SETPC "WHITE (STAMPOVAL 100 100 TRUE)
    SETPC "BLACK (STAMPOVAL 80 80 TRUE)
    SETPC "BLUE (STAMPOVAL 60 60 TRUE)
    SETPC "RED (STAMPOVAL 40 40 TRUE)
    SETPC "YELLOW (STAMPOVAL 20 20 TRUE)
    SETPC "BLACK STAMPOVAL 100 100
END
Playing a simple “target” game with the turtle is a good way to practice
estimating turns and distances. Define the TARGET procedure and then
run it. Move the turtle away from the target and then try to hit the
bull’s eye. See how many turns and moves it takes. Try using coordinate
moves, too.
You can drag the turtle with the mouse, too. Try playing the target game this way:
CS
Drag the turtle to a new location and then click in the Listener
TARGET PENUP HOME
- Use one RIGHT and one FORWARD command to hit the target
- Use HOME to get set for the next try
- Use SETHEADING and FORWARD
- Use one LEFT and one BACK command to hit the target
Logo has a special command for drawing rectangles, called
STAMPRECT. It takes two numbers as
input and draws a rectangle with the lower left corner at the turtle’s
current position. The first number determines the width of the
rectangle; the second number determines the height. If both numbers are
the same, a square is drawn. The rectangles are drawn similar to the
squares you made with SQUARE.XY - they do not rotate with the turtle,
but are always drawn in an upright orientation. Here is a rather long
command line you can try. It uses the optional input to draw filled-in
rectangles of random sizes and random colors at random locations.

CS
REPEAT 50 [
    PENUP
    SETXY LIST RANDOM 100 RANDOM 100
    SETPC RANDOM 14
    PENDOWN
    (STAMPRECT RANDOM 50 RANDOM 50 "TRUE)
]
 The turtle can leave a trail of its
shape as well as draw lines. Type:
The turtle can leave a trail of its
shape as well as draw lines. Type:
STAMP
The STAMP command “draws” an image of the turtle at its current position. You won’t see the stamped image until you move the turtle to another position. It doesn’t matter if the turtle’s pen is up or down or even if the turtle is invisible. Try stamping the turtle’s shape in different drawings. Here is an example to try:

CS REPEAT 8 [FORWARD 100 RIGHT 135 STAMP]
Try “dressing up” your COMPASS using
STAMP,
STAMPOVAL and
TURTLETEXT.
Try the TARGET game again, but this time, use
STAMP after each move to mark the spot. It
seems cruel to hurl turtles around like that! Arrows or darts would be
better. You’ll soon see how to change the turtle’s shape to just about
anything you want.
The Toolbox Shapes Panel
 The Toolbox window contains many resources
you can use in your Logo projects such as colors, controls, backgrounds
and shapes. To display the Toolbox, click on the Toolbox button in the
button bar.
The Toolbox window contains many resources
you can use in your Logo projects such as colors, controls, backgrounds
and shapes. To display the Toolbox, click on the Toolbox button in the
button bar.

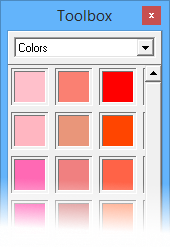
The first time you display the Toolbox, it shows the Colors panel. (If you save your environment with a different panel showing in the Toolbox, that panel will be the default next time you start Logo.) There are 22 blocks of colors - one for each color word in the COLORS list. You can drag a color to the background or to a turtle. You can add your own special colors, too. Just drag a color from the Color Picker and drop it in an empty space in the Colors panel.
The popup list at the top of the Toolbox lets you select any of the panels. Select Shapes to display the Shapes panel. To change the turtle’s shape to the moose, just drag the moose shape from the Shapes panel and drop it on the turtle. Watch carefully as you drag the shape over the Graphics window to the turtle.
 A box appears around the turtle to let you
know that you’re on target. If you miss the turtle, the turtle’s shape
will not change and the image becomes a bitmap object. (See Chapter 7 -
Bitmaps for more about bitmap objects.)
A box appears around the turtle to let you
know that you’re on target. If you miss the turtle, the turtle’s shape
will not change and the image becomes a bitmap object. (See Chapter 7 -
Bitmaps for more about bitmap objects.)

The new shape works like the original turtle shape. Type:
CS REPEAT 4 [FORWARD 100 RIGHT 90 STAMP]
Some shapes don’t look right when rotated. To prevent the turtle’s shape from rotating, type:

LOCKSHAPE
Use the up-arrow key to run the square again. This time, the moose stays upright even though the “turtle” turns like it did before. LOCKSHAPE just prevents the shape from rotating, not the turtle from turning.
Some shapes work well in any orientation, like the turtle or the roach. If you want to allow the turtle’s shape to rotate again, type:
UNLOCKSHAPE
If you drag the blank shape to the turtle, you may think the turtle is just hiding, but it’s not. It’s an invisible turtle, even when you type SHOWTURTLE. If you don’t see a shape you want, make your own.
The Turtle Shape Editor
 You can create your own shapes with
the Turtle Shape Editor. Click on the Shape Editor button to display the
Turtle Shape Editor window. The current turtle shape is automatically
loaded into the drawing grid which is 31 by 31 dots.
You can create your own shapes with
the Turtle Shape Editor. Click on the Shape Editor button to display the
Turtle Shape Editor window. The current turtle shape is automatically
loaded into the drawing grid which is 31 by 31 dots.
The gray dots are guides to help you align your shape as you fill it in. Red dots represent the actual shape. If you click on a red dot, it turns white (or gray) - effectively erasing part of the image. If you click a white (or gray) dot, it turns red and becomes part of the visible image.
![]()
You can click and drag the mouse pointer around to continuously draw or erase dots. Starting on a white (or gray) dot will draw red dots until you release the mouse button. Starting on a red dot will erase dots. To erase the entire drawing grid, click on the Clear button.

The illustration shows an arrow shape for use with the TARGET
procedure from earlier. Make your own arrow shape. It doesn’t have to be
exactly like this one. When you’re done, click the OK button to close
the Turtle Shape Editor window.
With the turtle in the shape of an arrow, try the TARGET game again.
It’s much better to throw arrows than turtles.
Saving Shapes
To save your new turtle shape, type:
(SAVESHAPE)
This form of the SAVESHAPE command displays the Save image as dialog. Each turtle shape is actually an image file in the Shapes folder under the Toolbox folder. Enter the name “Arrow” for your new shape.
Then, switch to a File Explorer window on Windows, or open a Finder
window on the Mac, and move or copy the shape into the Shapes folder
inside the Toolbox folder (you can find a shortcut to this folder inside
the Terrapin Logo folder in your Documents folder. You need to do
this on the operating system level, because storing a file inside the
Toolbox folder requires administrator privileges.
The next time you start Logo, your arrow shape will appear in the Toolbox Shapes panel along with all of the other turtle shapes. The shapes are arranged in alphabetical order, so “Arrow” will be the first shape in the panel.
Animation with Shapes
If you create a sequence of two or more shapes that are slightly different from each other and then quickly change the turtle’s shape over and over again, you can create the illusion of a live turtle. Look at the illustration above with the arrow in the Shapes panel. Notice that the turtle’s tail is pointing to the left. The tail on the default turtle shape is pointing to the right. You can make the turtle “wiggle” its tail by quickly changing its shape from one image to the other. First, type:
(SETSHAPE)
This form of the SETSHAPE command restores the original turtle shape, with the tail pointing to the right. Next, bring up the Turtle Shape Editor window. You don’t have to do any drawing - just click on the Flip horizontally button. This creates a mirror image of the original turtle shape; what was right is now left. Click on the OK button to close the Turtle Shape Editor window. Then type:
(SAVESHAPE)
Browse to the Shapes folder and enter the name “Turtle4” for this new shape. The original turtle shape is called “Turtle3.” You won’t see the new shape in the Shapes panel until you start Logo again - but don’t do that now. You can use a different form of the SETSHAPE command. Type:
SETSHAPE "TURTLE4
The change to the turtle shape is hard to detect because it’s just the tail that changed and it happened very quickly. Type:
REPEAT 20 [SETSHAPE "TURTLE4 SETSHAPE "TURTLE3]
The tail wiggles so fast, it’s just a blur! What you need is a way to slow it down, or a way to pause between shape changes. Use the WAIT command to control the timing of the changes. The input to WAIT is the number of thousandths of a second for Logo to wait before it runs the next instruction. Type:
REPEAT 5 [SETSHAPE "TURTLE4 WAIT 200 (SETSHAPE) WAIT 200]
You can make the tail wiggle faster or slower by changing the input to
WAIT. You can keep the tail wiggling longer
with REPEAT 20 or REPEAT 100 but what if you want to wiggle the tail
forever? Create a procedure that runs forever! (At least until you
stop it.) Type:
TO WIGGLE
In the Define a Procedure window, enter the commands as shown in the
illustration. The last line of WIGGLE causes WIGGLE to be run again
and again. It will not stop on its own. You will have to click on the
Red Traffic Light button to stop it.
TO WIGGLE
    SETSHAPE "TURTLE4
    WAIT 200
    (SETSHAPE)
    WAIT 200
    WIGGLE
END
A procedure that runs itself is called a recursive procedure. (See Chapter 11 - Recursion for more information.) A procedure that won’t stop on its own is called an infinite loop; it’s usually a mistake, but for demonstration purposes, it’s just what you need. Type:
WIGGLE
 With
With WIGGLE running as a normal command, you
can’t do anything else except watch the turtle wiggle its tail. Click
the Red Traffic Light button to stop it and then type:
LAUNCH [WIGGLE]
The LAUNCH command takes a list of instructions as input. It runs them in a special way, called a background process, that allows you to continue typing other commands in the Listener. The LAUNCH command also outputs a process identification number that uniquely identifies the background process that it just started running. You can stop the background process with the HALT command. It normally takes a process identification number as input and stops the process. Type:
(HALT)
This form of the HALT command does the same
thing as clicking on the Red Traffic Light button. It stops all
processes. Try making some shape sequences and animating them. Save your
new shapes in the Shapes folder. But remember, WIGGLE is just a
demonstration of recursion - there’s a lot more to it.
Animation with Automatic Movement

A picture’s worth a thousand words. Type:
SETVELOCITY 100
The turtle will continue moving forever, until you stop it. The input to SETVELOCITY is the number of turtle steps per second to move the turtle. A small number moves the turtle slowly; a large number moves the turtle really fast.
Changing shapes is one form of animation. Moving the turtle is another. However, using FORWARD is rather limited, as far as animation is concerned. You can use SLOWTURTLE to see the moves better, but no matter how large of a number you use, FORWARD will eventually stop. While FORWARD is running, nothing else can run until it’s done.
Setting the turtle in motion with SETVELOCITY is an exciting and powerful form of animation. Once the velocity is set, the turtle keeps moving without any more help from you. You can make the turtle go in reverse by either changing the turtle’s heading or by using a negative number for the velocity.
With the pen down, a visible moving turtle continues to draw lines. If
you hide a moving turtle, it will stop drawing and stop moving. If you
really need an invisible turtle to move and draw lines, set the turtle’s
shape to the blank shape.
How about sending a rocket into outer (turtle) space? First, you need to make a rocket shape with the Turtle Shape Editor. You can start with the arrow shape from earlier and modify it or just make your own rocket design. Save your rocket shape in the Shapes folder with the filename “Rocket.” Then type:
TO BLASTOFF
Define the BLASTOFF procedure. It sets the Graphics window to
WINDOW mode so the rocket can make it to
orbit. When you’re ready for the countdown, type:
BLASTOFF
TO BLASTOFF
    CT CS WINDOW PU SETTSIZE 2
    SETPC "RED SETSHAPE "ROCKET
    SETXY [-280 -130]
    PRINT 3 WAIT 1000
    PRINT 2 WAIT 1000
    PRINT 1 WAIT 1000
    PRINT [BLAST OFF ! !]
    SETVELOCITY 50
END
The rocket goes straight up into “space.” Add some “trajectory” to its flight path with turns. Don’t turn too far or it may cause a disaster! Leave the pen down to create an “exhaust” trail. Create a hot air balloon and make it float up and across the screen. You can combine automatic movement with changing shapes, too.
Multiple Turtles
Terrapin Logo lets you have lots of turtles all at the same time! When Logo starts, there are actually 16 turtles available (or defined) but only one turtle is active (listening and responding to your commands). The other 15 turtles are actually sitting at the home position, hidden from view, just waiting for something to do. Things can get confusing when working with multiple turtles, but the effort to learn about them is well worth it.
Every turtle has a number assigned to it, starting with 0. Type:
ALLTURTLES Result: [0 1 2 3 4 5 6 7 8 9 10 11 12 13 14 15]
The ALLTURTLES command outputs a list the available turtle numbers. With 16 turtles, the numbers go from 0 to
- To find out how many turtles you have defined (or available), type:
TURTLES Result: 16
The TURTLES command outputs the total number of turtles that are available. This may not be the same as the number of turtles that are currently active. Who are they?
WHO is Listening
Type:
WHO Result: 0
When Logo starts, only turtle number 0 is active. If only one turtle is active, the WHO command outputs one word to identify the turtle. When more than one turtle is active, WHO outputs a list. If you need to see a list of active turtles, regardless of how many are active, type:
.WHO Result: [0]
The .WHO command always outputs a list of active turtles, even when only one turtle is active. When more than one turtle is active, WHO and .WHO output the same value. If you want the count of how many active turtles there are, type:
COUNT .WHO
The COUNT command outputs the number of
elements in its input. You must use .WHO to
get an accurate count. If just turtle number 10 was active,
WHO could report the two-digit number 10 and
COUNT would output the number 2 because the
elements of numbers are the individual digits. Using COUNT .WHO, the
correct count of 1 would be obtained because
.WHO could output the one-element list
[10].
The values output by WHO and .WHO may not be numbers!
Turtle Names
Every turtle has a name as well as a number. Type:
TNAMES Result: [TURTLE.10 TURTLE.11 TURTLE.12 TURTLE.13 TURTLE.14 TURTLE.15 TURTLE.0 TURTLE.1 TURTLE.2 TURTLE.3 TURTLE.4 TURTLE.5 TURTLE.6 TURTLE.7 TURTLE.8 TURTLE.9]
The TNAMES command is short for
TURTLENAMES. It outputs a list of the
names of the available turtles. You can change the name of a turtle with
the SETTURTLENAME command
(SETTNAME for short). It needs two inputs - the turtle number or
current name and the new name. To change the name of turtle 0 to
TERRA, type one or the other of the following commands:
SETTNAME 0 "TERRA
SETTNAME "TURTLE.0 "TERRA
Sometimes it’s better to use a name and sometimes it’s better to use a number. It all depends on what you’re doing in your project.
Controlling Multiple Turtles
 Any available turtle will respond to
your commands if you ask it to. Type:
Any available turtle will respond to
your commands if you ask it to. Type:
ASK 1 [SHOWTURTLE FORWARD 50]
You can ask a group of turtles to run some commands, too. Type:
ASK [2 3 4] [SHOWTURTLE RIGHT 45 FORWARD 50]
Turtles 2, 3 and 4 are standing on top of each other. Since they all did the same commands at the same time, they ended up in the same place.
The ASK command needs two inputs. The first input identifies the turtle or turtles; the second input is a list of commands. Asking turtles to run commands does not make them active turtles - only the turtles reported by WHO are active turtles. Type:

WHO Result: 0
The active turtles respond to commands that are not directed to any particular turtle. Type:
SETTSIZE 2
BACK 50
Only turtle 0 responded to these commands because it’s still the only active turtle, even though turtles 1, 2, 3 and 4 ran some commands. The TELL command controls which turtles are active. There are four forms of the TELL command. To make all 16 available turtles active, type:

TELLALL 0 15
RIGHT 90 FORWARD 50
TELLALL activates the range of turtle numbers from its first input to its second input. All of the active turtles run your commands at the same time. You can still use ASK to run commands for just one or a few turtles.
You can activate the odd-numbered turtles or the even-numbered turtles with another form of TELL. Type:
TELLODD WHO Result: [1 3 5 7 9 11 13 15] TELLEVEN WHO Result: [0 2 4 6 8 10 12 14]
You can make just turtle 0 active again with either of the following commands:
TELL 0
TELL "TERRA
This form of the TELL command activates just one turtle identified by the input. You can use either the turtle number or the turtle name. Which one did you choose? It makes a difference to the WHO command.
TELL “TERRA WHO Result: TERRA TELL 0 WHO Result: 0
When you use names in TELL, then WHO reports names. When you use numbers in TELL, then WHO reports numbers. Be aware of who you tell!. The TELL command can accept a list of names or numbers as input, too. In fact, the list can have names and numbers in it. In that case, WHO reports a list with names and numbers as well.
You can use ALLTURTLES with TELL to activate all the available turtles. The following two commands do the same thing. The advantage of ALLTURTLES is that you don’t have to remember how many turtles there are.
TELL ALLTURTLES
TELLALL 0 15
After using TELL, all of the active turtles run your commands at the same time. When you use ASK, all of the turtles identified in the first input run the commands in the second input at the same time, too. How many different colors will you see after running the following command?
SETPC RANDOM 14
How many different colors will you see with this?
ASK ALLTURTLES [SETPC RANDOM 14]
In both cases, the command was run just one time, even though there are many turtles responding. Sometimes you need to have each turtle run its own version of a command. They need to take turns, especially in cases where you want something different to happen to each turtle. You can make the active turtles take turns running commands with the EACH command. It needs a list of commands as input. Type:
EACH [SETPC RANDOM 14]
With 16 turtles active, the list of instructions is run 16 times - once for each turtle. Chances are, they are different colors now. The EACH command is really a special shortcut. You could do the same thing with a sequence of commands something like this:
TELL 0 SETPC RANDOM 14
TELL 1 SETPC RANDOM 14
.
.
.
TELL 15 SETPC RANDOM 14
The commands in the run list for EACH are run in a similar way automatically. What really happens is that a TELL command is run with each turtle’s identification as it appears in WHO - it may be numbers or names. Inside the EACH run list, WHO reports the identification of the current turtle. It’s a convenient way to modify the instructions so that each turtle does something slightly different. Type:

CS TELLALL 0 15 SHOWTURTLE
EACH [SETH WHO * 360 / 16]
EACH [FORWARD 8 * WHO]
Make sure that WHO contains numbers when you
need them! The above example will not work if
WHO contains names. Having a lot of turtles
on the screen is fun, but imagine the activity when they are all
animated! The REGATTA procedure creates a sailboat race with all 16
turtles. Define REGATTA and then run it a few times.
TO REGATTA
    CS WINDOW TELL ALLTURTLES PU HOME ST SETX -300
    SETSHAPE "SAILBOAT LOCKSHAPE
    EACH [SETPC PICK COLORS]
    EACH [FORWARD RANDOM 150 BACK RANDOM 150]
    SETHEADING 90
    EACH [SETVELOCITY RANDOM 25]
END
 See if you can pick the winner. Make
your choice appear different from the rest so you can tell which ship is
yours. Try this:
See if you can pick the winner. Make
your choice appear different from the rest so you can tell which ship is
yours. Try this:
REGATTA ASK 3 [SETTSIZE 2]
The sailboats “float” off the screen at the finish line. Try these commands and then just play around on your own.
REGATTA WRAP
TELLODD SETHEADING 270
TELLEVEN SETTSIZE 1.5
ASK [1 2 3] [PENDOWN]
Check out the difference between CLEAN, CLEARSCREEN and DRAW. Only one of them stops the ships. Only one of them resets the shapes to turtles.
Creating a Lot of Turtles
You can control how many turtles are available with the SETTURTLES command. It takes a number as input and creates that many turtles. If there are already turtles available, they are erased before the new ones are created. You must have at least one turtle, but you can have up to one hundred if you want them. Type:
SETTURTLES 4
ALLTURTLES
WHO
TNAMES
SETTURTLES assigns turtle numbers from
0 up to one less than the number in the input. It also does a TELL 0
command to reset WHO to turtle 0. The turtle
names are in the default format, with the turtle number as part of the
name.
Be reasonable about how many turtles you create. A large number of
turtles is fun but requires a lot of computing power. You can do
interesting things with just a few turtles, too. Define the SETUP and
CHASE procedures. Run SETUP first to put the turtles in a square
arrangement, then run CHASE.
TO CHASE
    ASK 0 [SETH TOWARDS ASK 1 [GETXY] FD 1]
    ASK 1 [SETH TOWARDS ASK 2 [GETXY] FD 1]
    ASK 2 [SETH TOWARDS ASK 3 [GETXY] FD 1]
    ASK 3 [SETH TOWARDS ASK 0 [GETXY] FD 1]
    CHASE
END

TO SETUP
    CS SETTURTLES 4
    TELL 0 PU SETXY [100 100]
    TELL 1 PU SETXY [-100 100]
    TELL 2 PU SETXY [-100 -100]
    TELL 3 PU SETXY [100 -100]
    TELL ALLTURTLES ST PD
END
You have to click on the Stop button to stop it; it’s another infinite loop for demonstration purposes. With each turtle chasing its neighbor, where do you think they’ll meet? What will their paths look like? What if they move different amounts? What if one turtle doesn’t move at all?
Creating One New Turtle
The SETTURTLES command erases all of your turtles before it creates new ones. If you need to create an additional turtle, you can use either NEW or DECLARE. Both of these commands create one additional turtle without affecting the existing turtles. First, reset the number of turtles to 4. Type:
SETTURTLES 4
The NEW command creates one new turtle. Type:
NEW "TURTLE
Result: TURTLE.4
The input to NEW must be the word “TURTLE
to create a new turtle. (NEW is also used to
create other Logo objects that you’ll learn about later.) The output of
NEW is the name of the new turtle. The new
turtle is placed at the HOME position with
its pen down.
You can also create an additional turtle with the DECLARE command. Type:
DECLARE "TURTLE "TERRA
The DECLARE command is similar to the
NEW command. You must use the word “TURTLE
as the first input to DECLARE to create a
new turtle. (DECLARE is also used to
create other Logo objects.) The second input to
DECLARE is the name for the new turtle,
chosen by you. The new turtle is placed at the
HOME position with its pen down.
If you erase a turtle, it leaves a gap in the number sequence as well as the name sequence. Type:
ERASE 2 TNAMES Result: [TURTLE.0 TURTLE.1 TURTLE.3 TURTLE.4 TERRA] ALLTURTLES Result: [0 1 3 4 5]
If you create another new turtle, the situation gets a bit confusing.
NEW “TURTLE Result: TURTLE.2 ALLTURTLES Result: [0 1 3 4 5 6]
The new turtle is number 6 but its has the name TURTLE.2!
Turtle names must be unique - they do not have to match the turtle
number. After all, TERRA is turtle number 5 in this example. Don’t let
the default names become a problem. Assign turtle names that mean
something to you or that identify the purpose of the turtle.