Blue-Bot and Tuff-Bot Commands
 Are you a proud owner of a Blue-Bot, or a
Tuff-Bot? Have you ever dreamed of programming these cute little bots
with Logo? Then this chapter is for you! All others, please read on.
Are you a proud owner of a Blue-Bot, or a
Tuff-Bot? Have you ever dreamed of programming these cute little bots
with Logo? Then this chapter is for you! All others, please read on.
The Blue-Bot
 The Blue-Bot is much like an intelligent version
of the famous Bee-Bot; it can talk Bluetooth, however. When a connection
to Blue-Bot has succeeded, the Blue-Bot turns blue.
The Blue-Bot is much like an intelligent version
of the famous Bee-Bot; it can talk Bluetooth, however. When a connection
to Blue-Bot has succeeded, the Blue-Bot turns blue.
 The first command that you should
enter is BLUEBOT?. It returns TRUE if Logo
finds your Blue-Bot, or FALSE if it does not. You may want to use this
command within your Logo program, and stop running if
BLUEBOT? returns FALSE.
The first command that you should
enter is BLUEBOT?. It returns TRUE if Logo
finds your Blue-Bot, or FALSE if it does not. You may want to use this
command within your Logo program, and stop running if
BLUEBOT? returns FALSE.
When you try to push one of Blue-Bot’s buttons while it is connected, you will notice that the buttons do not work anymore. Blue-Bot can only listen to a single source of commands: it is either the buttons or the computer, but not both. Therefore, Weblogo has two commands for two important buttons:
BLUEBOT.GO acts as if you pressed the GO button, and BLUEBOT.CLEAR clears Blue-Bot’s memory as its CLEAR button would.
A more important command is the BLUEBOT.RUN command. It takes a list of commands, downloads it to Blue-Bot and runs it. Alternatively, it also accepts a procedure name, and downloads the contents of that procedure. The BLUEBOT.WRITE command also downloads a command list or procedure, but it does not run it afterwards. You need to issue the BLUEBOT.GO command afterwards. This is handy if you want to execute the same sequence of commands over and over again.
If you call BLUEBOT.RUN with a procedure name, BLUEBOT.RUN downloads the contents of the procedure to Blue-Bot. Note that the use of variables like procedure inputs is not permitted.
Blue-Bot’s knowledge of Logo commands is very limited, and its memory is
limited to 200 commands. Please note that a Logo command may consume
more than one Blue-Bot command. If you get an error message that your
code is too complex, consider using a repeat loop, or fewer movements. A
FD 10 command, for example, might store 10 FD commands into Blue-Bot’s
memory.
For a complete list of Blue-Bot commands, please see the BLUEBOT.RUN command.
Here’s an example. Guess what it does!
BLUEBOT.RUN [FORWARD 1 LEFT 45 FORWARD 1 LEFT 135 FORWARD 1 LEFT 45 FORWARD 1]
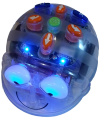
The Tuff-Bot
Tuff-Bot is Blue-Bot’s big brother. It is way more rugged, and it can even avoid obstacles. When a connection to Tuff-Bot has succeeded, the Tuff-Bot turns blue.
Tuff-Bot has the same commans as Blue-Bot, but they all begin with TUFFBOT instead of BLUEBOT. So if you want to check if a Tuff-Bot is connected, you use the command TUFFBOT? instead of BLUEBOT?, and if you want to run commands, use TUFFBOT.RUN instead of BLUEBOT.RUN.
Tuff-Bot has two buttons. The left button enables obstacle detection, and the right button sets the speed mode. The TUFFBOT.BUTTONS command programs these buttons.
Also, you can define what Tuff-Bot should do when it detects an obstacle. The default is:
- back up one step
- turn right 90 degrees
- forward one step
- turn left 90 degrees
With the TUFFBOT.OBSTACLE command, you can define another procedure that Tuff-Bot runs when it detects an obstacle. You should keep this procedure short, however.
Simulate a Robot
A bot is just a floor turtle, so why not use a turtle on-screen as a bot? Just give it the shape of a robot, like
SETSHAPE "~HOME/TOOLBOX/ROBOTS/BLUEBOT
And you have the bot on screen. Of course, moving the turtle by one unit
does not really move it, because a turtle unit is a single pixel.
Therefore, you can change the number of pixels that the turtle advances
by changing the turtle’s STEPSIZE property. This property is the
factor that a forward or backwards movement is multiplied with. Usually,
this factor is 1, but you can change that factor to any value you like.
The command PPROP 0 “STEPSIZE 25, for example, makes turtle #0 move
25 pixels for each FORWARD or
BACK unit.
For Blue-Bots, its natural step size is about the size of the bot, which is 15 centimeters for Blue-Bot. For a realistic movement, you would need to do the following:
- LOADSHAPE your turtle to the desired
shape (or drag and drop the shape from the Toolbox, but please note
that such a turtle is actually a
BITMAP, which means that it cannot draw). - Determine its size by examining the turtle’s
SIZEproperty. - Set the turtle’s
STEPSIZEproperty to the shape’s height. - Optionally alter the turtle’s
CRAWLproperty to make it move slower on the screen.
This procedure would do all this for you:
TO MAKE.ROBOT :TURTLE :ROBOT
    ASK :TURTLE [LOADSHAPE WORD "~HOME/TOOLBOX/ROBOTS/ :ROBOT]
; set the step size
    PPROP :TURTLE "STEPSIZE LAST GPROP :TURTLE "SIZE
; have it slow down for realistic movement
    PPROP :TURTLE "CRAWL 0.5
END