First Impressions
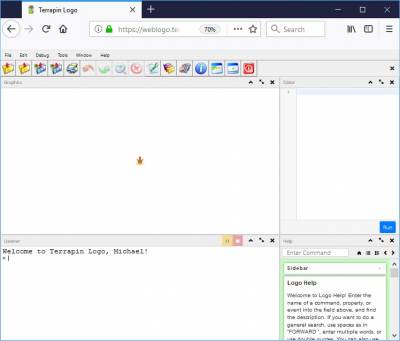
Here we are. This is the Logo page. To begin with, you have three areas of interest. At the top, the menu bar provides access to Logo’s features. The Graphics panel occupies the top two-thirds of your screen, with the turtle residing in the middle. The Listener occupies the lower part of the screen.
There are many more panels that are not visible initially. You can
select the Window menu and then select a panel to make it visible, or
you can press a hot key like Ctrl+Alt+E for the Editor panel.
Before You Start
Logo can save a copy of your Logo workspace and the contents of the Editor panel. You should save very often in case your browser crashes, or if you manage to refresh the page by accident. You can change what Logo saves in the Settings dialog.
When you log out, the Web version of Logo asks you if you’d like to keep your Logo data for the next time you log on. If you are a student working in a classroom, it is a good idea to have Logo forget about your personal Logo data unless you want someone else to pick up your work where you left off.
You can also use the RESTART command to erase all saved Logo data.
Configure your Screen Estate
➽ Please note that you cannot drag or resize panels on handheld devices like tablets or smartphones.
Logo’s panels are extremely configurable, which lets you arrange all of these panels to your liking. You can drag panels around, resize them, and rearrange them completely. When you drag a panel, its position and size snaps to a 20×20 grid to help you with the alignment of the panels.
Each panel has three buttons in the upper right corner:
 Click this button to shrink the panel to its mere
title bar. Click it again to restore the panel.
Click this button to shrink the panel to its mere
title bar. Click it again to restore the panel.
 Click this button to have the panel occupy the entire
screen. Click it again to restore the panel.
Click this button to have the panel occupy the entire
screen. Click it again to restore the panel.
 Click this button to hide the panel. Use the Window
menu to show it again.
Click this button to hide the panel. Use the Window
menu to show it again.
This is an example where the Listener is at the top, and the Graphics and Toolbox panels at the bottom:

You can save and restore your layout using the Window menu. If you messed up, you can also reload the original Logo panel layout.
Of course, you can also program the panel positions and sizes from Logo if you want your program to arrange the panels. If you save your workspace, the panel layout is saved along with your workspace contents.
Each Logo panel has its own name. This name is available to Logo as a
property list. To list the Listener panel properties, for example, you
can use the command PLIST “LISTENER.
Let’s talk about the panels one by one.
The Icon Toolbar
This is not a real panel, because its position is fixed at the top. You can close the icon toolbar if you need the additional screen real estate. To show the icon toolbar again, use the Window menu.
The Listener
Entering Instructions
 The Listener panel is where you type commands or
instructions for Logo to do. Often the results will affect the Graphics
panel, but sometimes you’ll see a response in the Listener.
The Listener panel is where you type commands or
instructions for Logo to do. Often the results will affect the Graphics
panel, but sometimes you’ll see a response in the Listener.
Canyoutellwhatthissays? Can you tell what this says?
Putting a space between the words of a sentence makes a big difference.
The same is true for Logo. When you enter instructions into the Listener
panel, make sure you put a space between the words. Press the
Enter key to tell Logo to run the
instruction.
Make sure the Listener panel is the
currently active panel (the one with the highlighted title bar). To make
the Listener panel current, just click in it with the mouse, but watch
where the vertical insertion bar (or cursor) appears because that’s
where your typing will be entered.
The illustration shows some examples that you should try yourself. You
can use capital letters if you want; that’s what Logo uses for output
but it’s not fussy about your input. Watch carefully as you type the
letters and you will see how the colors change. This is called syntax
highlighting and it’s much more than just colorful. It can help you
avoid errors.
The quotation mark inserted before
the word “hello” for example, tells Logo to use the word as is and not
to attempt to use it as a command. If you really want to enter
lowercase words (in case you want Logo to print them in the same case
that you entered them), use vertical bars around the words. You can also
use backticks, which automatically also quote the word.
(The backtick character is on the same key as the tilde, just below the Esc key.)
Many of the Logo commands have an abbreviation that means the same thing. The PR in the second example is short for PRINT. This saves typing time, but you’ll always know what PRINT means.
To Err is Human
 Everybody makes mistakes. It’s going to happen.
Even with the syntax highlighting and trying to be very careful, you’re
going to press
Everybody makes mistakes. It’s going to happen.
Even with the syntax highlighting and trying to be very careful, you’re
going to press Enter before you see that typo.
Don’t worry about it. Logo will quietly let you know there is
a problem and then you can fix it easily. In this example, since I
forgot to use the quotation mark before the word “hello”, Logo tried to
find the HELLO command to print whatever the command outputs instead of
just printing “HELLO”. Since Logo didn’t understand this nonsense, it
displayed a message to let me know that HELLO was the problem.
What now?? I don’t want to type the whole line again!
 There are a few ways I can correct this
mistake. I can move the insertion bar with either the mouse or the arrow
keys. Since I’m already typing, I find it easier to use the arrow keys.
Getting rid of unwanted characters depends on where the insertion bar is
placed. If it’s in front of the characters, then use the
There are a few ways I can correct this
mistake. I can move the insertion bar with either the mouse or the arrow
keys. Since I’m already typing, I find it easier to use the arrow keys.
Getting rid of unwanted characters depends on where the insertion bar is
placed. If it’s in front of the characters, then use the
Delete key; if it’s after the characters, then use the Backspace
key. Once I have added the quote character, all I have to do is press
the Enter key to make Logo run the instruction again.
I could even just use the mouse to highlight any text
and press Enter, and Logo will
happily attempt to execute all highlighted text.
Pasting Logo Commands
 You can also paste entire procedures into the
Listener panel. What you need to do, though, is to tell the Listener
what exactly Logo should read when you press the
You can also paste entire procedures into the
Listener panel. What you need to do, though, is to tell the Listener
what exactly Logo should read when you press the
Enter key. Usually, Logo reads the
line where your cursor is in and runs that line. If you paste more than
one line, though, Logo does not know which line to read. Therefore, you
will have to highlight everything that Logo should read before pressing
Enter. Use your mouse to click and
drag the highlighting until you are satisfied, then press
Enter. In the example to the left,
the entire procedure (which has been pasted before) is highlighted, and
Logo would read and define that procedure once you press
Enter.
The clipboard is available to you in the Listener and Editor panels, although the menu lacks the menu items “Cut”, “Copy” and “Paste”. This has technical reasons. After you select a text, right-click the text and select “Cut” or “Copy”. To insert text, right-click the panel at the desired location and select “Paste”.
You can also use the standard keyboard shortcuts on desktop systems:
Ctrl+C
or
Cmd+C
- Copy
Ctrl+X
or
Cmd+X
- Cut
Ctrl+V
or
Cmd+V
- Paste
Debugger Buttons
The two buttons in the upper right corner are active when a Logo program
is running. The left button  pauses the program and
enters the debugger, and the right button
pauses the program and
enters the debugger, and the right button  stops your
program altogether. During a pause, the left button turns into a green
“Continue” button that lets you continue program execution.
stops your
program altogether. During a pause, the left button turns into a green
“Continue” button that lets you continue program execution.
The Graphics Panel
 The Graphics panel is your main drawing
panel. When your turtle draws, it moves across the panel and leaves a
trail much like you would leave a line on a sheet of paper with a
pencil.
The Graphics panel is your main drawing
panel. When your turtle draws, it moves across the panel and leaves a
trail much like you would leave a line on a sheet of paper with a
pencil.
The Logo “sheet of paper” is actually more
like a glass panel. Your background image, color, and pattern go onto
the back side of the glass while your turtle drawing goes onto the front
side. Turtles, bitmaps and controls rest in front of the glass
panel.
This glass panel has a fixed size. It is
2000 pixels wide and 2000 pixels tall, with the turtle coordinates [0
0] in the center. A pixel is like a dot. If you paint the smallest dot
on the glass surface, it is a pixel. If you move the turtle 100 units,
you actually paint 100 dots or pixels. This means that you can paint
1,000 steps in either vertical or horizontal direction before your
painting gets lost.
What you see in the Graphics panel is only a small part of the underlying glass panel. The Graphics panel acts as a viewport (or window) to the glass panel. The Graphics panel can vary greatly in size but does not cause any change to your drawing.
If you had the chance to look at Logo from the side, this is what you might see:

See the thick glass plate? On the back side, you can see a background image, and the turtle has drawn a red square onto the front of the glass. The turtle itself hovers over the glass and the viewport is above all, hiding most of the picture.
 Going back to the screen and looking at the whole
thing from above, you would see this through your viewport.
Going back to the screen and looking at the whole
thing from above, you would see this through your viewport.
The Toolbox
 The Toolbox panel contains many resources
you can use in your Logo projects such as controls, shapes, backgrounds
and colors. The popup list at the top of the Toolbox lets you select any
of the panels.
The Toolbox panel contains many resources
you can use in your Logo projects such as controls, shapes, backgrounds
and colors. The popup list at the top of the Toolbox lets you select any
of the panels.
The Toolbox panel is hidden to begin
with, Select Window/Toolbox or press
Ctrl+Alt+T
to make it appear.
For right now, select the Colors
panel. To use a color, just drag it from the panel to the Graphics panel
or a turtle.
The Colors panel shows the 138
extended colors arranged in groups by shades of intensity (from light to
dark). You can see each color’s name by hovering the mouse pointer over
a block. The COLORS command displays a list
of all 138 color names; type SHOW
COLORS in the Listener panel to see the
list of color words in numerical order.
If you drop a color on top of a turtle, it sets the turtle’s pen color.
If you drop a color onto the Graphics panel, the drop spot is the origin
of a FILL command with the dropped color.
However, if you press the Ctrl
button during the drop, Logo uses the color as the background color, and
does not alter the graphics itself.
The color words can be used in SETPC and
SETBG. Put a double quotation mark in front
of the color word. Try SETBG "ORANGE. If you can’t decide on a color
yourself, try SETPC PICK COLORS.
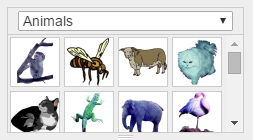
 The Toolbox
contains a huge number of images. Drag an image, like an animal, to the
Graphics panel, and create a new turtle that has the shape of this
animal. You can also drop an animal on top of a turtle to change its
shape. The “Backgrounds” toolbox contains a number of backgrounds; drop
one of them on the Graphics panel to see how it works. The “Tiled
Backgrounds” toolbox also contains background images, but these are
tiled, meaning that they are stitched together to form a background.
The Toolbox
contains a huge number of images. Drag an image, like an animal, to the
Graphics panel, and create a new turtle that has the shape of this
animal. You can also drop an animal on top of a turtle to change its
shape. The “Backgrounds” toolbox contains a number of backgrounds; drop
one of them on the Graphics panel to see how it works. The “Tiled
Backgrounds” toolbox also contains background images, but these are
tiled, meaning that they are stitched together to form a background.
Finally, the “Controls” toolbox contains a number of control elements that you can drag to the Graphics panel. When you drop a control, it is created as a turtle with a few extra properties and procedures to put these controls into life. See the section about controls for details.
Did you know that you can drop toolbox items and files into the Listener or into the Editor? When you drop a file, it drops the item’s complete file name. This can save you a lot of typing when you write a Logo command that works with a file name!
Logo Help
 This panel contains the entire online reference
for all Logo commands. You can click and browse all commands. Many
commands come with sample code, which you can copy and then paste into
your Listener input field; press
This panel contains the entire online reference
for all Logo commands. You can click and browse all commands. Many
commands come with sample code, which you can copy and then paste into
your Listener input field; press
Enter to execute the sample code
after pasting. You can also use the HELP
command to find a specific command. Just enter HELP “command into the
Listener input field and press Enter
(substitute “command” with the command that you would like to learn
about as, for example, HELP "FD).
The buttons
display either the home page, the list of commands, the list of
properties, or the previous and next commands that you have entered into
the input field. Note that if you click any links in the help page,
these links will not change the list of pages that you can view with the
two right buttons; they keep only track of the commands that you have
entered, or commands that you displayed with the
HELP and
PHELP commands.
The
Help panel is hidden to begin with, Select Window/Help or press
F1 to make it appear.
The Logo Editor
 The Editor panel is hidden to begin with,
Select Window/Editor or press
The Editor panel is hidden to begin with,
Select Window/Editor or press
Ctrl+Alt+E
to make it appear. This panel is a full-blown Logo editor with syntax
highlighting and more. When you click its “Run” button, it loads the
entire contents into Logo workspace and executes the code. You can also
edit a file (Select File/Load Editor on the Menu), or save the editor
contents to disk or a cloud storage.
Blocks
 The Blocks panel lets beginners get an easy
start with Logo. Please refer to the next chapter for details.
The Blocks panel lets beginners get an easy
start with Logo. Please refer to the next chapter for details.
The Menu
Let us look at the menu bar and its items. Many menu commands have “hot keys” or key combinations attached to them you can press to invoke the menu command. Please note that handheld devices like tables or smartphones do not offer hot keys.
File
The File menu lets you manage files.
Load…: The Load menu has several sub-items. You can load a Logo file
or a Zip archive from disk into your workspace. Logo loads and executes
a Logo file immediately. It loads Zip archives into the ~FILES storage;
then, it collects all .LGO files at the top level and runs them in
no particular order. Or you load a file into the editor, you load a
workspace or a picture, or you load a Zip archive into the ~FILES storage.
See this page for more info.
Save: The Save menu has the same sub-items as the Load menu. You can save the workspace, the editor contents, the ~FILES storage, the environment, or the Graphics panel as a picture. See this page for more info.
Print: Here, you can choose between printing the contents of the Editor panel, the Listener contents, or a screen shot of your Logo window. Note that printing the Editor contents or the Listener does not print any colors; Logo only prints the contents without any extra formatting.
Logout: You can log out by selecting this menu item.
Edit
This menu is only active when the Editor panel is active; it contains a number of editing commands, like Cut, Copy or Paste, or Find and Replace.
Debug
This menu contains a number of debugging commands. It is only available when a program has been paused. See Squash the Bugs! for details.
Tools
The Tools menu collects a number of edit commands, and a few important dialogs.
New Procedure: Opens the Editor panel with an empty procedure
template for you to fill in and define. You can also enter the first
line of a procedure definition beginning with TO into the Listener
panel to edit or define a procedure.
Edit…: The Edit menu items lets you edit all procedures, names etc.
Select Voice… lets you select a voice that Logo uses to speak to you when you use the SAY command.
Shape Editor… launches the shape editor.
Settings…: Opens the Settings dialog, where you can edit your password, or your Dropbox connection, or modify Logo’s global settings.
Apps…: Open the Apps dialog, which displays a list of all available apps.
Window
This menu lists all panels, and whether they are visible or not. For each panel, the menu defines a hot key for quick access. It also includes items to manage your panel layout:
Save Layout: Saves your current layout to an internal storage location, where Logo reloads it every time it starts. Please note that students who log on to a classroom cannot save the layout.
Restore Layout: Select this item if you want to restore the last saved layout of your panels.
Select Layout…: Lets you pick one of several predefined layouts.
Help
The Help menu lets you display the Help panel, or it displays information Terrapin Logo itself. The command “Help/Hot Keys” lists all hot keys that Logo knows, which can be very helpful.